
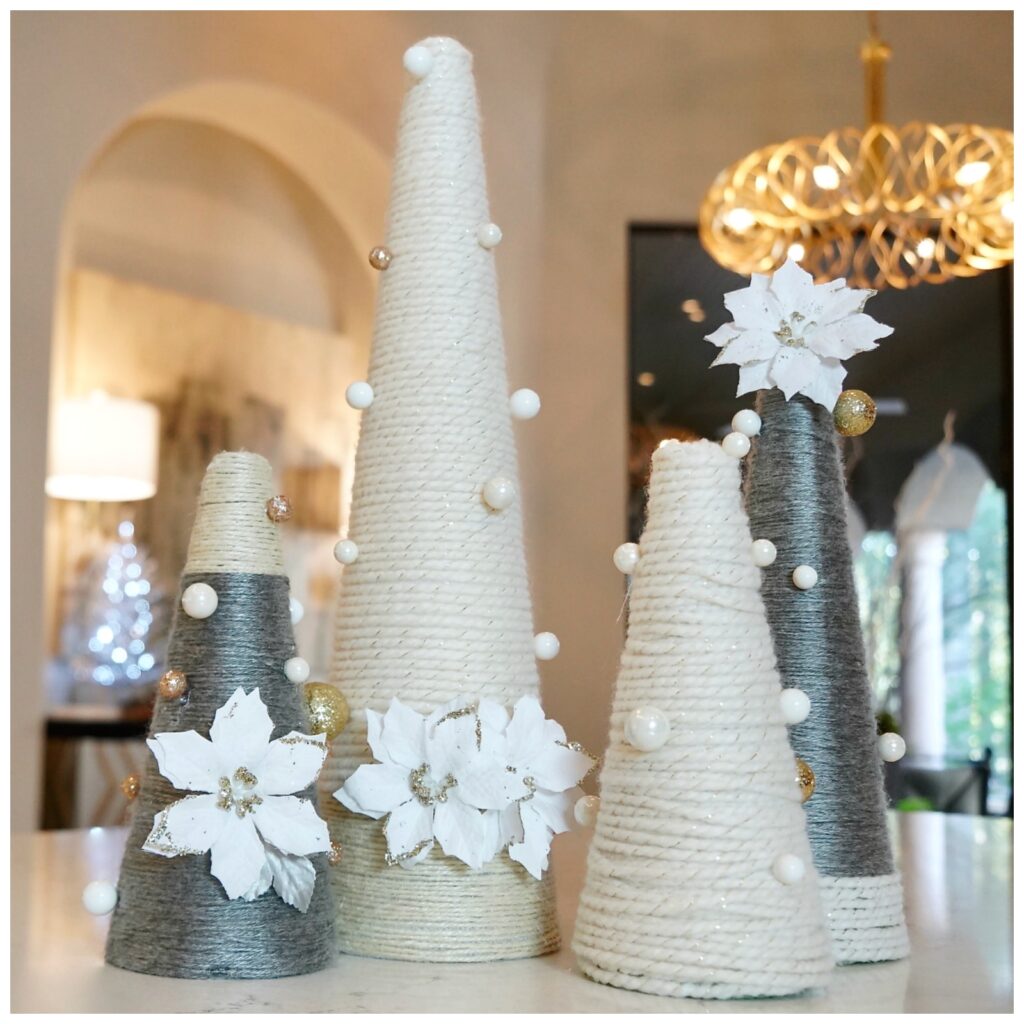
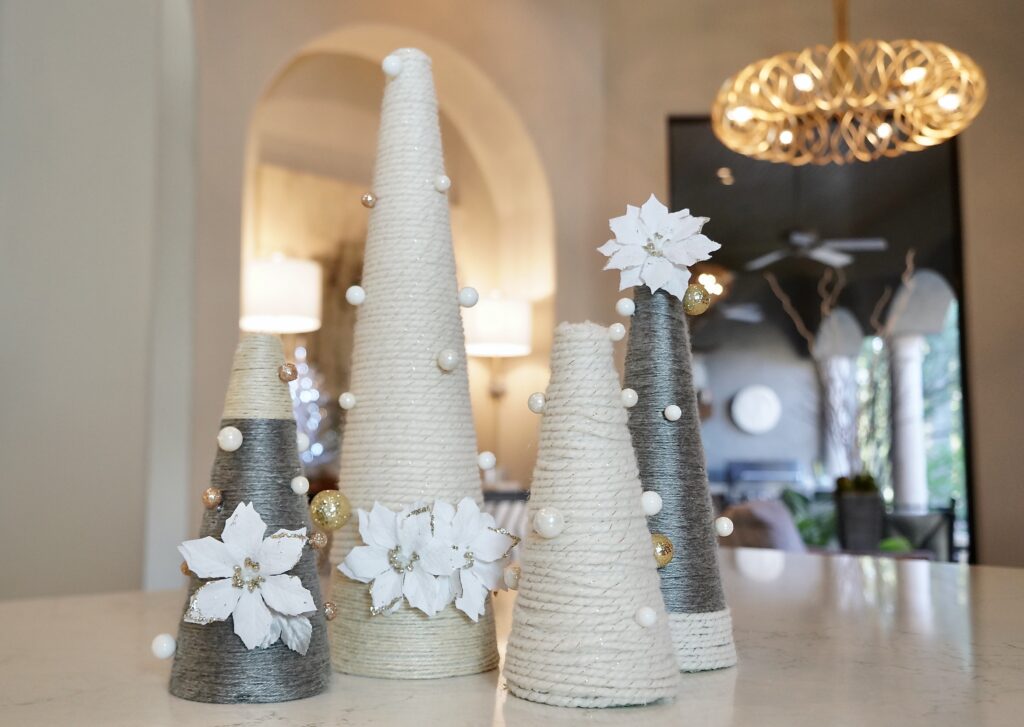
Yarn and DIY are two words that go practically hand-in-hand! You all have LOVED our DIY blogs so we thought it was time for another, especially since this year we’ve had so much time. Today we are showing you how to make the CUTEST yarn trees.
Yarn Tree Supplies
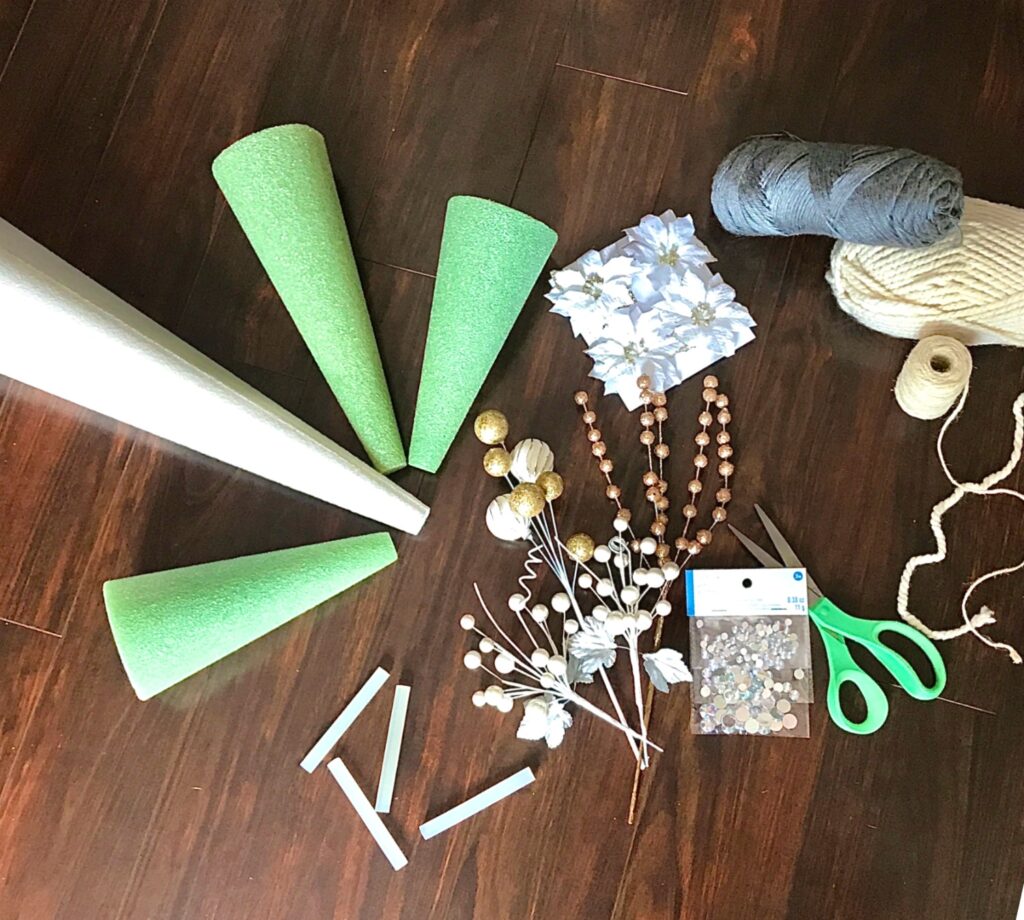
- Your favorite yarn. Here you can choose the color that is going to suit you best. Thick or thin, fuzzy or wool, this is all about you!
- Foam cone forms of various sizes. (White foam is easiest to work with for light colors. Green foam works just as well!) Here is our tall tree and here is our smaller!
- Wreath decorations
- Hot Glue Gun and sticks
- (Optional) Popsicle stick to smooth or smudge the hot glue
Tip: Set the Mood
Could we really make the perfect DIY yarn trees if we weren’t feeling the Christmas spirit? Turn on the Christmas jams, make that hot cocoa (this is a favorite of mine), fill up your cute mug, and start creating with holiday love!
Step One: Where is Your Focal Point?
While your glue gun is warming, take a second to look at different combinations of your yarn.
I started with the biggest tree since that is the general focal point of the yarn trees. This tree, for me, was started with the twine at the base. Put a small dot of the hot glue as close to the bottom as you can get it.
Step Two: Dots of glue
Grab your yarn and press the raw end of it into the hot glue. I did this every inch or so for the first two laps around the trees to make sure it would not unravel or come lose.
Step Three: Yarn Tree taking form
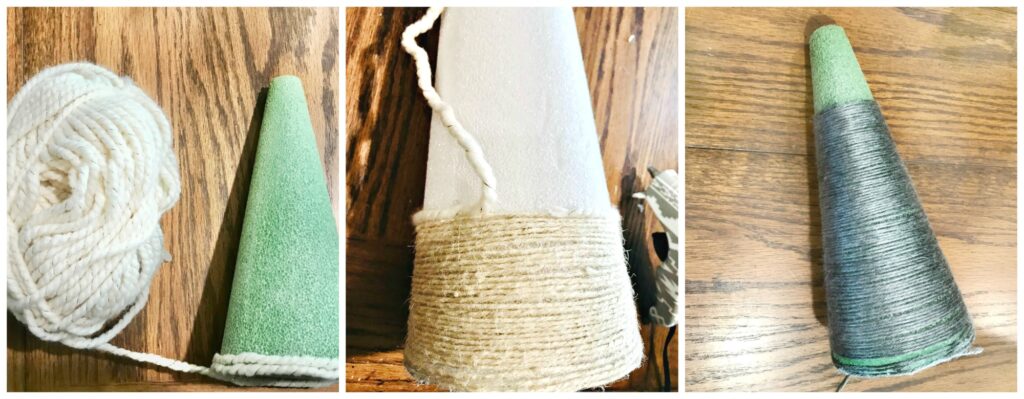
Here comes the best part!! Spin the tree around while keeping the yarn kind of snug, and go until you reach the top. I also chose to do a hot glue ring around the last layer at the top to hold it in place. You can stop at any point to add in transitioning yarns, as I did for a few of my trees. If a transition is being done, then treat it just like the first couple of layers and make sure it will stay on with a few dots of glue to hold it in place.
*Tip: You may need to go around two or three times to cover up some gaps where the foam is showing if you are using a thinner yarn, like the grey colored yarn tree.
Step Four: To top or not to top…?
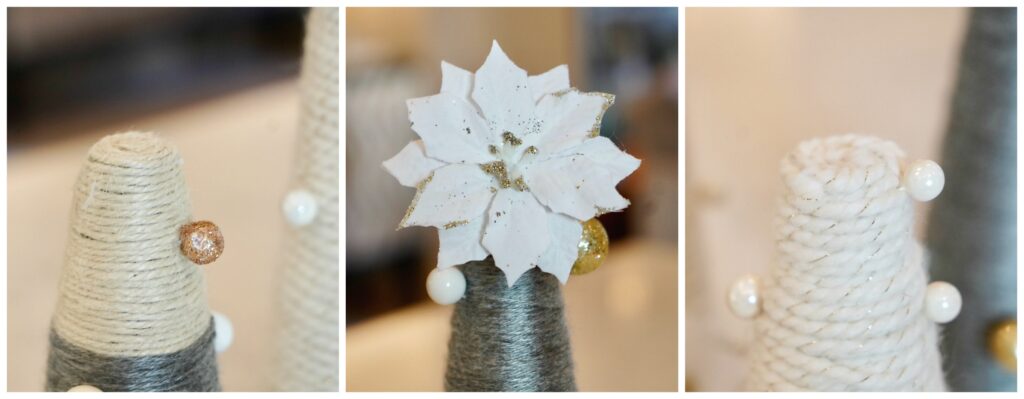
If you are going to put a larger decoration at the top, i.e. a star or pompom, then you will not need to put the yarn at the top. However, I did not have a topper that would cover the entirety of the top, so I covered the top in hot glue and did a spiral on the top with the yarn.
The Grand Finale: Decorating! (optional)
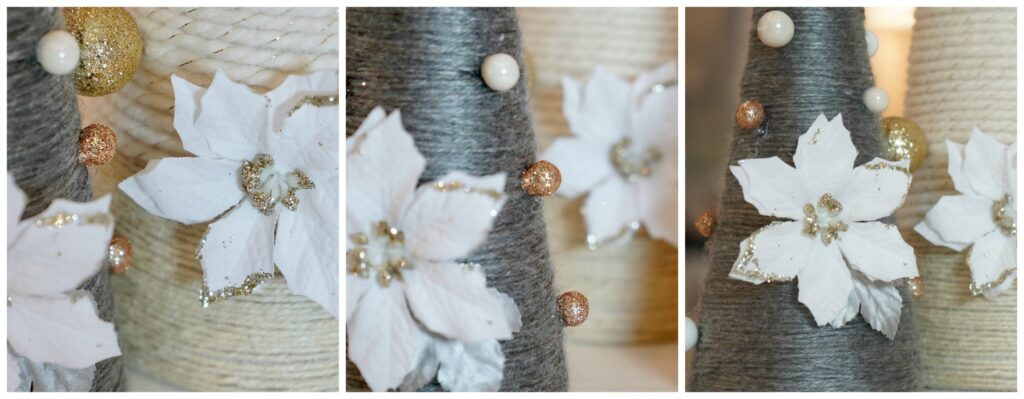
Now it is time to put on those ADORABLE ornaments that you chose. There is no specific placement for these decorations. I did put these all around the yarn trees just so all of the trees were able to be shown off instead of just one side. These can be hot glued onto the yarn itself, or if you got decorations on a wire, then the wire can be poked through the foam to stay in place.
*Total time this project took: Roughly 1.5 Hours
Yarn Tree Supplies

Thanks to Marissa Trombatore for creating this DIY!
SHESHE’S TIDBITS
This weekend I am packing for our trip to Tennessee for Thanksgiving and putting the final touches on our Christmas decorations. I don’t know about you guys but I am finally starting to feel the stress of COVID, the election and the state of our country. I am mostly a very happy stable person but not feeling so good lately. Anybody feeling like I am? Praying so hard that this will ALL be over soon. XO, SheShe
ABOUT SHESHE SHOW
- WELCOME new readers. We are a fashion/travel/lifestyle blog. We talk about anything and everything, from fashion, travel, health issues to even an occasional recipe. Let us know if there is a topic that interests you. We will do our best to bring that story to you. Have a great week sweet friends and thank you for following along. Without you, we could not continue on this crazy fun journey.
- Be sure to check out the ShopSheShe tab at the top in the menu bar. Hover over and choose the category in the dropdown. We try to keep it up to date with the latest and greatest for all budgets. Subscribe here and then you won’t miss a post. Simply enter your email in the pop-up box or below. Also, download the LiketoKnow.It App, follow @shesheshow to shop all of our daily outfits, home, beauty, and more. Go here for our LiketoKnow.It tutorial.

I know exactly what you mean. I, too, am praying for a end to COVID and some stability in our country. Have a blessed Thanksgiving.