
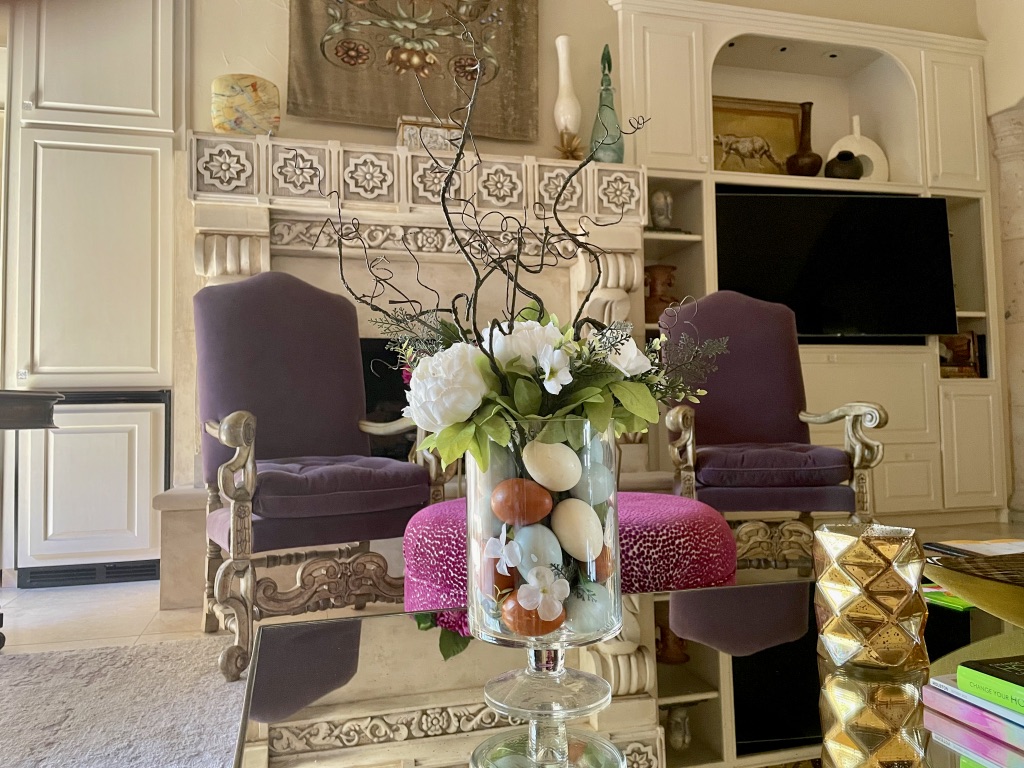
Easter is right around the corner and we are getting crafty around here! Today we’re showing you how to make an egg-travagant Easter centerpiece! This project is easy and only calls for 7 items.
What You Will Need

Pedestal Vase – We went with a medium-size vase here but there are smaller and larger options. This depends on where you are placing yours and your budget. Ours is the 6×9 and under $25!
Spray Paint – Here we have the Chalked spray paint that gives the perfect egg texture. We have a creamy white, robin egg blue, as well as a terracotta brown. You can switch up your colors if you’d like to maybe a pink or yellow!
Wooden Eggs – These eggs are the ones we’ve used and we will be spray painting them. You can dye them with watercolor or paint them. We are going with the less time-consuming option!
Willow Branches – I wanted to add these willow branches to give an earthier feel and add height!
Silk Flowers – Peonies are fresh and not to mention, a sign of spring! Here are the peonies we selected. Feel free to pick your favorites!
Step One: Paint Time
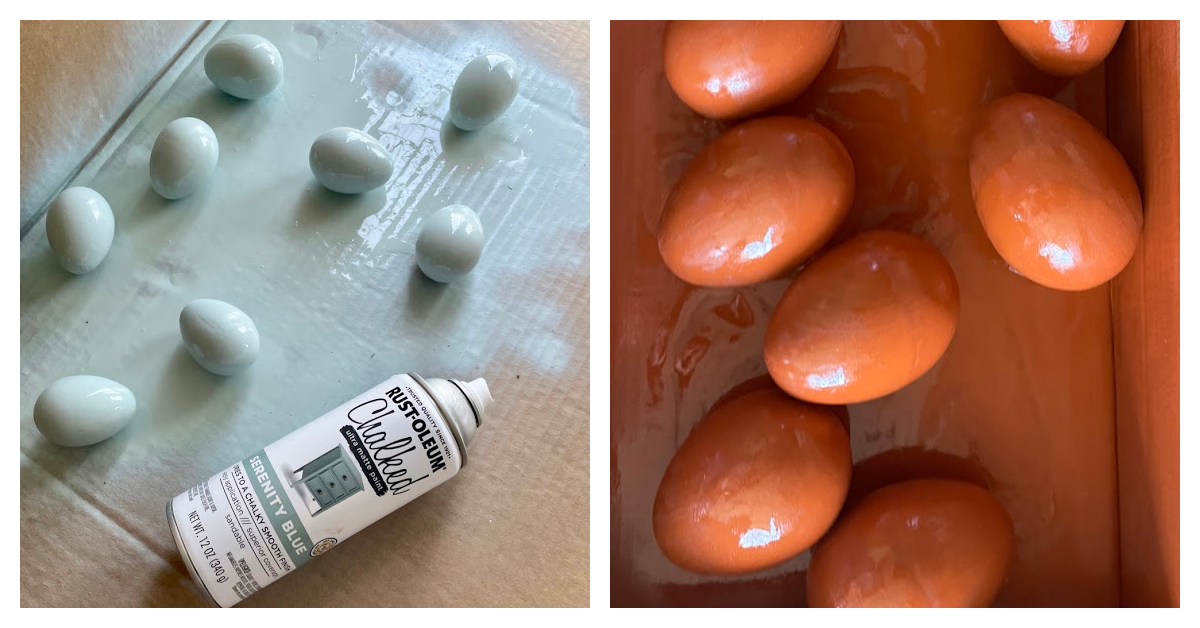
Since it is zero fun to watch paint dry let’s knock this out first. The three colors we have chosen are all inspired by real egg colors. So, now you could take the time to build a fancy spray booth for these eggs, that way they are easier to paint and not smudge. However…we grabbed a cardboard box and headed to the outdoors. To get the eggs from rolling around on the flat box, press them into the cardboard to make an indention. Viola! Paint time! Another key point is that eggs have blemishes too…not every eggshell is smooth, so it is okay for a line or a spec to happen.
Step Two: Flowers and Greenery

Next, is time to really picture how much greenery and flowers you want to put into the serving bowl. When Easter comes to mind, I picture spring…green grass, flowers blooming, and pops of color all around. With that said, we really attempted to incorporate that into the serving bowl. Furthermore, we also took this time to fluff some of the flowers, take leaves and flowers off of the stems, if you are going to use them in the container, and curl our curly willow branches.
Step 3: Easter Egg-citing Placements
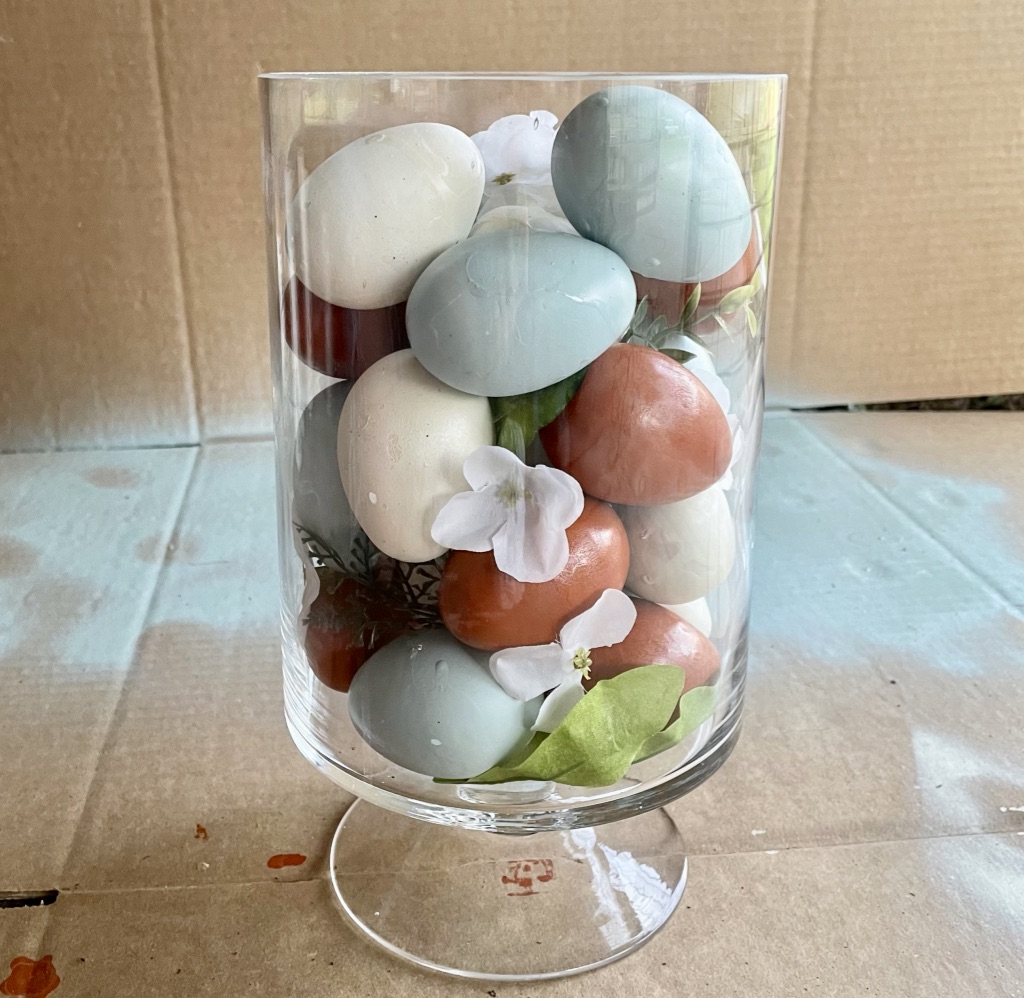
After the eggs are dry, it is time to place them into the serving bowl. Now, you can leave the bottom of the bowl bare and begin to stack the eggs into the container, or similarly add in the leaves on the bottom to add some under color and filler. To really compliment each color, we tried not to double up on the colors (no color touching the same color), but in the end, it is all about what appeals to the eye. While stacking in the eggs, throughout the container we placed some smaller flowers and greenery because we wanted that earthy look to it.
Final Steps to Easter Centerpiece
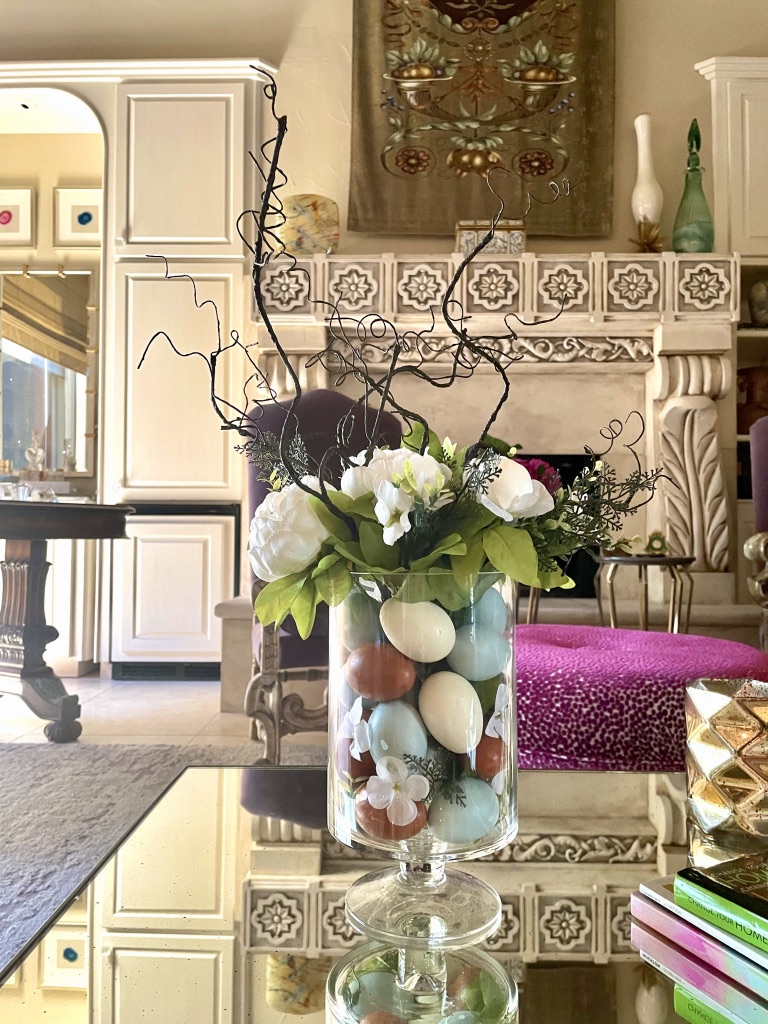
Lastly, we are placing our height pieces. The poppies and curly willow branches are securely tucked in-between eggs. With this in mind, try to hide as much of the stem with eggs and more greenery. We suggest this because it can take away from the centerpiece’s eye-catching ability. With attention to the eggs, try and set this centerpiece where it will be displayed and give it a once over. Making sure that there are enough color balance and volume. Hoppy Easter friends!
EASTER DIY SHOP
SHESHE’S SATURDAY TIDBITS
Well, SheShe has some quiet time for a few days. I just put Norman and Francesca on a plane back to Houston. I am so busy but I love a little self-care time for a few days. Does anyone know what I mean?
Did you see my Facebook Live with Chico’s the week? If you missed it you can still see it here https://www.facebook.com/watch/live/?v=755705878419218&ref=watch_permalink and here https://www.facebook.com/LoveChicos/videos/854881231758251 I hope you enjoy!!
ABOUT SHESHE SHOW
- WELCOME new readers. We are a fashion/travel/lifestyle blog. We talk about anything and everything, from fashion, travel, health issues, skincare tips, to even an occasional recipe. Let us know if there is a topic that interests you. We will do our best to bring that story to you. Have a great week sweet friends and thank you for following along. Without you, we could not continue on this crazy fun journey.
- Be sure to check out the Shop SheShe tab at the top of the menu bar. Hover over and choose the category in the dropdown. We try to keep it up to date with the latest and greatest for all budgets. Subscribe here and then you won’t miss a post. Simply enter your email in the pop-up box or below. Also, download the LiketoKnow.It App, follow @shesheshow to shop all of our daily outfits, home, beauty, and more. Go here for our LiketoKnow.It tutorial.